The estimated reading time 1 minutes
I frequently use the Lists application in my daily work and find it helpful for some purposes. Therefore, in this post, I’d like to discuss the views in Lists and make them a little more understandable.
If you’re new to lists, you can watch some tutorials online and get a lot of information.
There’s also a description of views here , but I personally find it a bit too in-depth. Hence this blog post.
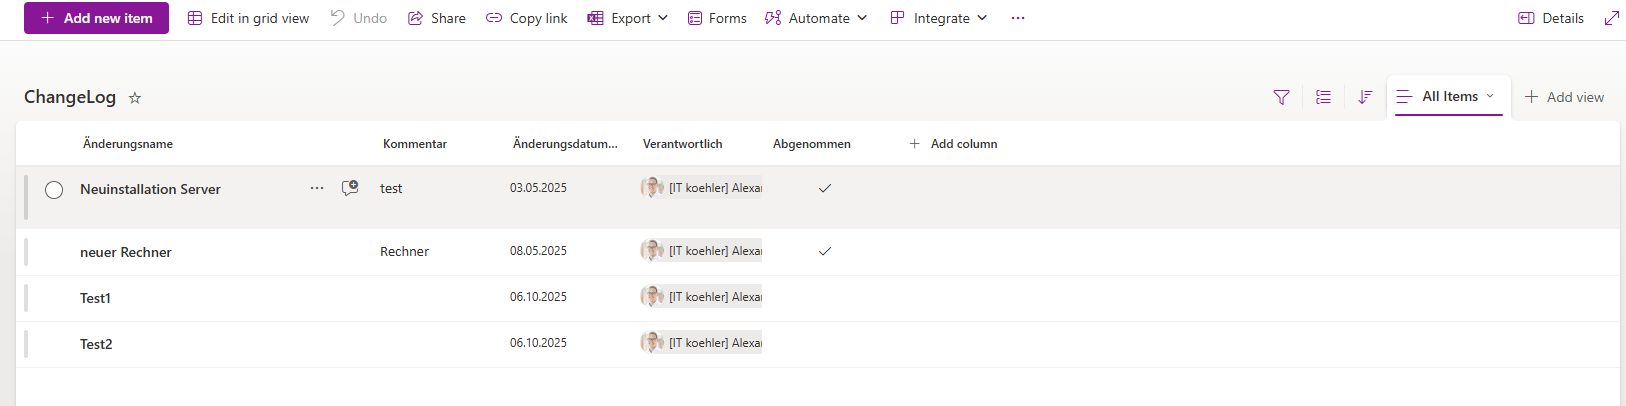
This is a small list but it is well suited to create views.
I usually leave the default view (depending on the application, of course) and create a new view.
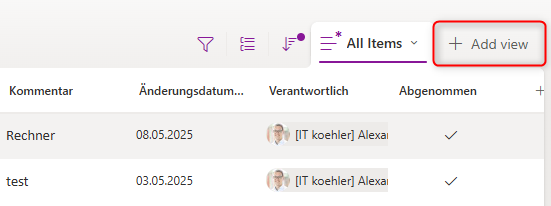
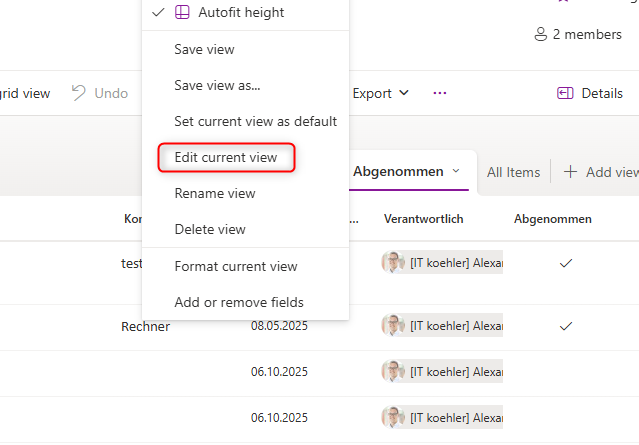
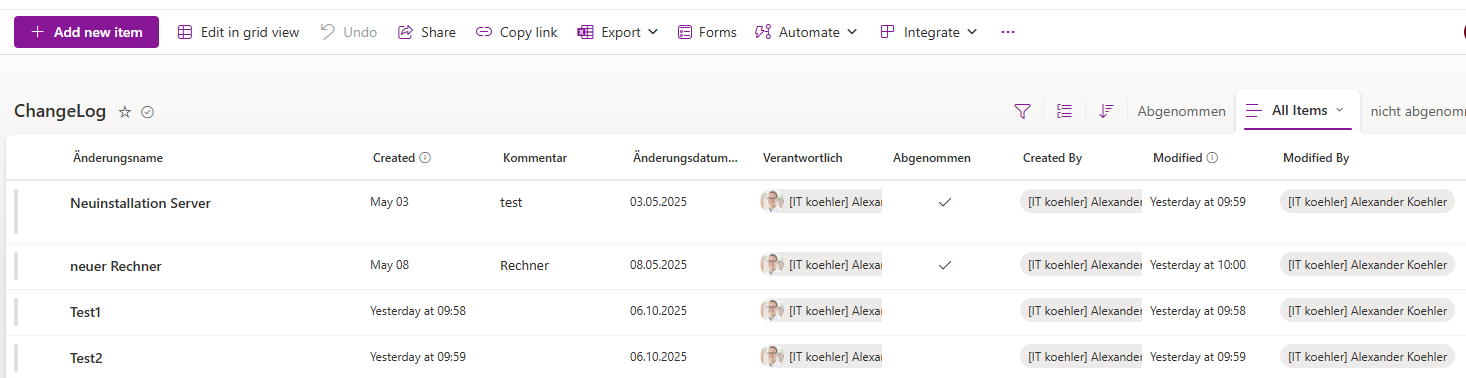
In my case, I want to continue working with the list, so I’ll continue selecting the list view. This view should only show “rejected” entries.
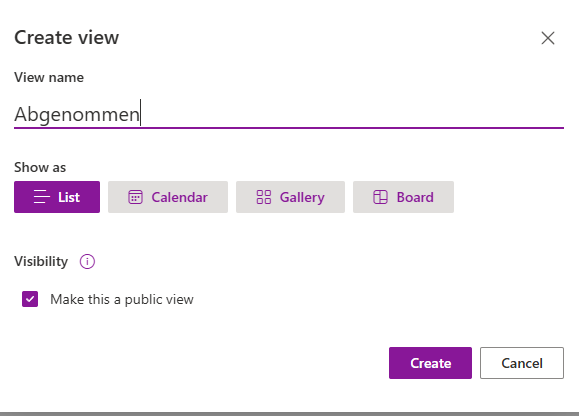
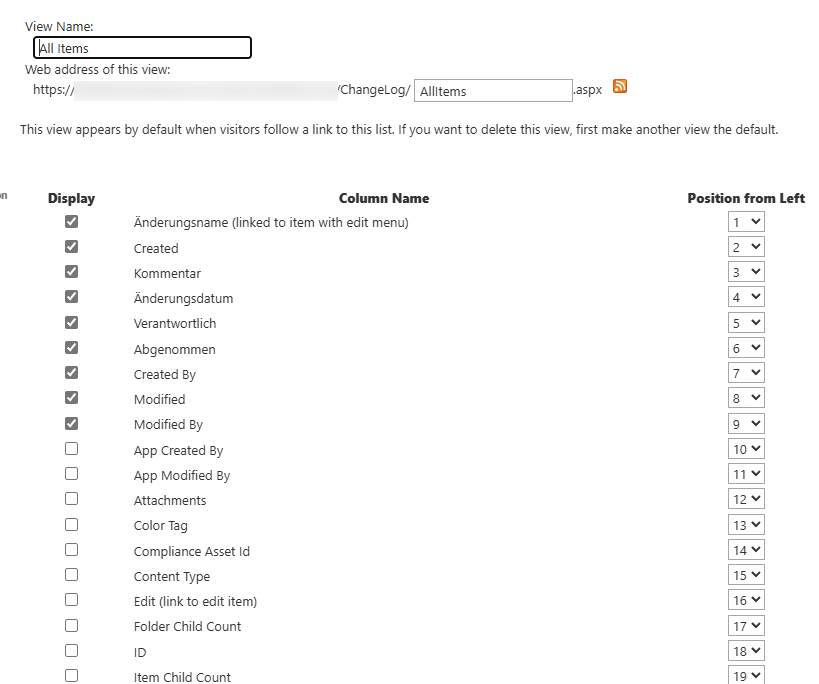
The view will now be created and initially show only all entries. ” Make this a public view ” creates the view for all list members!
NOTE: If the button is grayed out, this is due to permissions on the lists.
This can now be adjusted by changing the view.
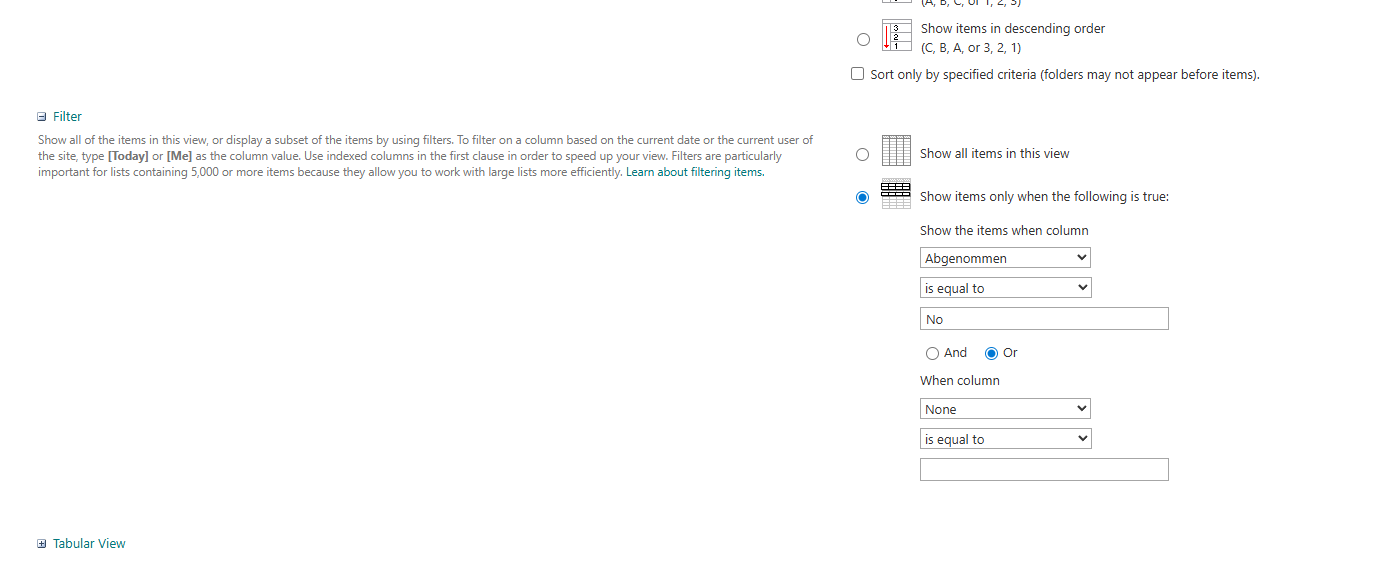
Within the SharePoint view, you can now scroll down to “Filter” and adjust the corresponding parameters. In my case, I want to display all approved entries, so the following option must be set:
Yes , or Ja in German
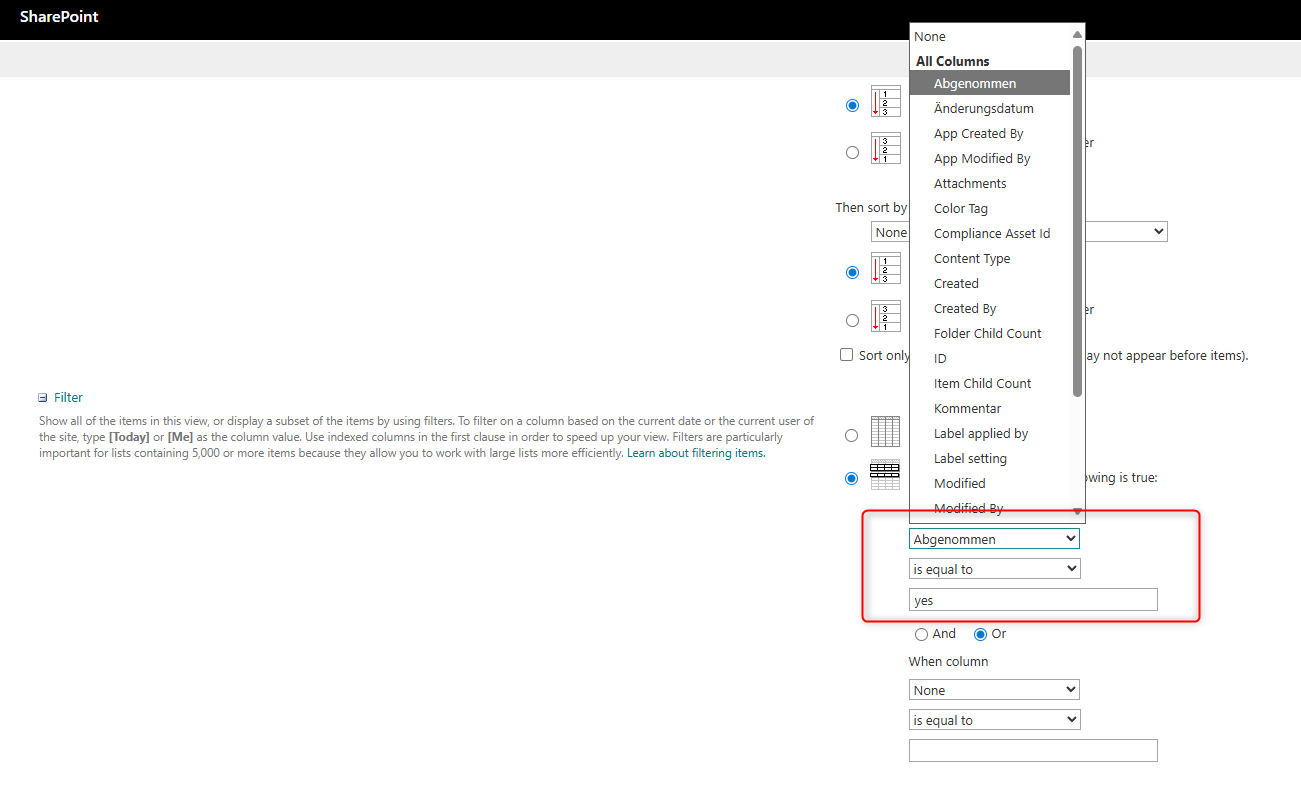

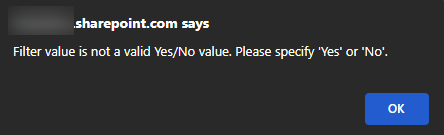
This also works the other way around with No or in German Nein (if you specify something else you will get a friendly message when saving).

This is a simple feature, but it offers a lot of potential in Lists. Of course, the views can be further customized.
I wish you much success with Lists. If you liked this post, please leave me a “helpful” vote.